Saturday, August 26, 2017

Carleton by Censorio – Burnaby Heights

Carleton by Censorio is the next new development to come to the popular Burnaby Heights neighbourhood.  With all the shops, services, easy access to downtown Vancouver, SFU and the North Shore, you can see why people choose to live in Burnaby Heights. Carleton is a small boutique building which will feature only  28 units comprised of 1 and 2 bedroom conods. These homes will range in size from 591 to 1119 square feet.


To be kept up to date on this development and many more like it, register with us today!


This is not an offering for sale. Such an offering can only be made after filing a disclosure statement. E.&O.E.  This information is for marketing purposes only and is subject to change.

The post Carleton by Censorio – Burnaby Heights appeared first on Vancouver New Condos.


from Buildings – Vancouver New Condos http://ift.tt/2vgNiFL

Friday, August 25, 2017

Salisbury South – Port Coquitlam Townhomes

After quickly selling out Salisbury Walk and Salisbury Lane, Macleans Homes is ready to bring their newest  townhomes development to Port Coquitlam.  Salisbury South is a new townhouse development will be centrally located at 2145 Prairie Avenue, Port Coquitlam, This boutique collection of townhomes will feature the same quality, comfort and privacy as their first two Salisbury projects, all nestled in a quiet residential neighbourhood of west Port Coquitlam.

To be kept up to date with this development or others like it, Register now to be kept in the loop


This is not an offering for sale. Such an offering can only be made after filing a disclosure statement. E.&O.E.  This information is for marketing purposes only and is subject to change.

The post Salisbury South – Port Coquitlam Townhomes appeared first on Vancouver New Condos.


from Buildings – Vancouver New Condos http://ift.tt/2iyttU7

The Week in Review 269

A memory/ narrowly engrained/ friendships made.

Ridge Walk

If you enjoy The Week in Review & other articles why not support me with a coffee or two? I work Full-Time on Hiking in Finland to bring you inspiring trip reports, in-depth gear reviews and the latest news from the outdoors. You also could subscribe to the rarer-than-ever Newsletter and follow along on Instagram, Twitter and Youtube for more outdoorsy updates!

Meet the ULA Photon, the little brother of the CDT.

Watch Why Patagonia is Fighting for Public Lands.

On the same note: Outdoor Brands Cautiously Wading into Politics.

Columbia is launching the ReThreads program, but only in U.S. Brand and Outlet locations.

Kenneth is now running backpackinglight.dk, expect the new/ old webshop to open soon!

Arc’teryx is recalling the Procline Boot, check out if yours are affected.

Brand new from from Hyperlite Mountain Gear is The Shell, a waterproof-breathable jacket which will delight ultralight backpackers at 164 g in Size M.

Check out Green Guru Gear at Garage Grown Gear.

Read Chris Townsends Collection of Lightweight Backpacking Articles.

Get a 10% off on all As Tucas orders until 30 August with coupon code SUMMER-10.

You also currently can get 15% off on Katabatic Gear Quilts.

The Arc’teryx Sale at Alpinetrek.co.uk is still going strong, lots of great gear with steep discounts.

And at Backcountry you can get 30% Off one Full-Price Arc’teryx item with Code: 30ARC.

Save up to 40% off at the REI Labor Day Sale & Clearance Event!

House with a view

Trip Reports

Beautiful photos from bikepacking the Colorado Trail - recommended!

Nice Video of Jennifer’s Scratched TCRno5.

Max took his wife and son fly fishing - very cool!

Erika enjoyws the views but not the dozens of people on the Arbengrat/ Obergabelhorn. [German]

Drew helps you drive around the Snæfellsnes Peninsula to find the best spots for hiking!

Vermont’s Long Trail. [Polish]

Episode 1 of Bikepacking in France.

Mario might have Raced the French Divide.

Alex is now since over 90 Days on the trail on his hike from Vienna to Nice. [German]

Read Beardoh and SweetPea’s Post Hike Thoughts on the Colorado Trail.

Stefanie enjoys cake with a view at the Winnebachseehütte. [German]

A hike on the Via Ferrata Drachenwand. [Polish]

Go on a Microadventure on the Bruschetta Loop.

And Nicholas just started his 1000 Miles Adventure in Czechia.

Gear Reviews

I want you to try a tarp on your next backpacking trip, hence I wrote about Tarps for Beginners & Experts.

Alex’s ultralight experiment of 2017.

Kate reviews the Norrøna Falketind Flex1 Pants.

David reviews the Montbell Expedition Pack 70.

Kathrin lets us take a look into her hiking shoe closet. [German]

Disclaimer: There are affiliate links in this article to help finance the website. Read the Transparency Disclaimer for more information on affiliate links & blogger transparency.


from Hiking in Finland http://ift.tt/2wM2NF1

Monday, August 21, 2017

Tarps for Beginners & Experts

Confused about Tarps? Don’t be: Tarps are a great way to camp out as you are closer to nature, you can see the sunrise & sunset from your quilt, there’s less condensation and tarps are very light. In this article I present four tarps and useful accessories for beginners and experts alike so that on your next trip you can sleep close to nature under your tarp!

Packrafting & Camping

The Best Tarp for Beginners

At a wee bit over 70€ the DD Hammocks Superlight Tarp, a flat square tarp, doesn’t brake the bank and offers beginners in tarping a Tarp with which they can experiment. Use it as a Diamond pitched against a tree? No problem! As an A-Frame with your trekking poles? Voilá! As a big canopy to cook and sleep under with some friends? Of course! At a claimed weight of 460 g excluding pegs and guy lines it’s not heavy, either. If you don’t mind more weight but want something cheaper, check out the Urberg Premium Tarp. These square tarps are very useful and could be all the Tarp you ever need if you stay low on your trips or are not afraid to experiment with pitching it!

Camp 1

The Colourful Spinnaker Tarp

PicharPak Workshop is a Cottage Manufacturer out of Hong Kong and it’s owner Jason makes some superb Tarps. The colourful DS Tarp is made from Spinnaker and weighs a mere 279 g incl. the guylines and stuff sack - that’s pretty amazing! Add in that they are priced very good and this makes for the perfect tarp for anyone that wants some more colour in there outdoor life. These tarps also allow you to pitch higher in the mountains as they can be pitched with trekking poles, and you can pitch them very low so they create a nice windproof shelter. The advantage of Spinnaker is that it is light and comes in many different colours - much more than just grey! And as you usually pitch your tarp when it rains this means at least you’d be sitting under a colourful piece of fabric instead of one which has the same colours as the clouds above!

DS Tarp, Spinnaker Bird's Eye View on the DS Tarp, Spinnaker

The Triple C Tarp

A Catenary Cut Cuben Tarp is in my experience much easier to pitch and they are also really light. Some argue that they’re less flexible than flat tarps because you only can pitch them in a limited number of setups - if these work for your trips, though, there’s nothing that speaks against them. I personally really like Cat-Cut Cuben Tarps and they work great for my trips in the forests and hills. These tarps are pretty pricey, though - that’s because cuben is an extremely expensive material and also the Cat Cut is more work-intensive than a simple square. But if you invest the $€£ then you get a great Tarp that will make you happy each time you pitch it. In this category fall the Hyperlite Mountain Gear Echo II and the Yama Mountain Gear 9’/7’ X 9’ Tapered Tarp, among several others.

The Expert Tarp

The Hyperlite Mountain Gear Square Flat Tarp is the ideal choice for ultralight backpackers which have reached a Zen Master level. The versatility of this shelter is just like the Beginner Tarp, just that this Cuben Version is a lot lighter - my 8’6” x 8’6” tarp weighs 289 g including guylines! This is a lovely tarp that’s very easy to pitch in many different ways, and I find it ideal for bikepacking as I don’t need to carry poles with me - I usually pitch it between trees or look for a death stick to use as a pole.

A lightweight spring adventure by bike

Useful Accessories

Usually you won’t encounter a Tarp Enthusiast without a Bivy on the trail. Tarp + Bivy go hand-in-hand as both are ultralight, versatile in use and pack really small in your pack. I am using a Wilderness Threadworks Cuben + Silnylon bevy which I love, but I equally loved my Tyvek LAUFBURSCHE Bivy. If you decide you need a bivy: Buy some Tyvek and start sewing, a simple bivy is the easiest MYOG Project you can start with. The Mountain Laurel Designs SuperLight Bivy is very light and popular, too. And the beauty of the bivy and tarp combo is of course also that you can use them on their own just like the weather dictates!

Bed

If you like something with a bit more headspace than a bivy bag then the Yama Mountain Gear Bug Shelter Silpoly 1P or the Hyperlite Mountain Gear Echo II Insert allow you still to see the sunrise and sunset from your quilt, but without mosquitos or midges buzzing around your head. These also transform your tarp into a tent as now you have two layers of fabric between you and the outdoors - one to keep the bugs out, and one to keep you dry. Of course, just like the bivy, you can use the net shelters also on their own on pretty days where it won’t rain but the bugs are a problem.

You can’t pitch your Tarp without Pegs. I always carry a wide variety with me and regularly test new ones, currently I often use these Swiss Piranha pegs, the MSR Mini-Groundhog Stake, some simple Aluminum Tent Pegs with a colourful head so they’re easier to locate and some V Pegs as these are pretty versatile in many different kinds of terrain. It’s best to carry just the right amount of pegs with you which you need to pitch your tarp, and use two strong pegs - like the Swiss Piranha ones - for pitching out the main guylines.

20150402-_DSC9355

Guy lines are also something you’ll need for your tarp. There’s many different kinds and pretty much every tarp mentioned above comes with some sort of it, but the best in my opinion is a reflective Dyneema cord as these are very strong and you can see them in the light of your headlamp at night. There’s nothing more annoying than tripping over your guylines at night when nature was calling, as then you’ll need to pitch the tarp again in the worst case. Thus: Reflective cord!

I’m not a fan of Ground sheets at all, I find them messy in use (as in packing them up after a wet night) and hence I don’t use them. But there’s plenty of tarp enthusiasts who use a ground sheet, and Polycro is very much liked for its very affordable price and SUL weight - though an Emergency Blanket is just a few grams heavier and can be used in an emergency as the name suggests; plus it might keep you warmer at night as it reflects heat.

That’s it! Yes, there’s other Tarps out there which might/ could/ should have been in this article - let me know what I missed in the comments, as well as Tarp Tips you might have!

Up to Sca Fell

Disclaimer: Several of the mentioned Brands - PicharPak Workshop, Hyperlite Mountain Gear, Wilderness Threadworks, amongst others - have provided me with samples of their equipment. But as you know: I’m keepin’ it real and tell you how it is - I maintain full editorial control of the content published on Hiking in Finland. Read the Transparency Disclaimer for more information on affiliate links & blogger transparency.


from Hiking in Finland http://ift.tt/2wvBQW4

Friday, August 18, 2017

TWIR 268

“No one is born hating another person because of the color of his skin or his background or his religion. People must learn to hate, and if they can learn to hate, they can be taught to love, for love comes more naturally to the human heart than its opposite.” - Nelson Mandela, via Barack Obama.

Scotland!

If you enjoy The Week in Review & other articles why not support me with a coffee or two? I work Full-Time on Hiking in Finland to bring you inspiring trip reports, in-depth gear reviews and the latest news from the outdoors. You also could subscribe to the rarer-than-ever Newsletter and follow along on Instagram, Twitter and Youtube for more outdoorsy updates!

Listen to the The Dirtbag Diaries: 081.

Read Sweet dreams: Why do big brands crave climbers?

View the American Landscape Photo Contest Winners.

Ponder about Path Investment in National Parks.

Take a look at TruHike, a new cottage that makes trekking poles from recycled materials.

Be in awe about the big new route on Gasherbrum I SW Face by Marek Holeček and Zdeněk Hák.

Agree? Disagree? Direct-to-consumer outdoor gear is a win-win for manufacturers & consumers.

Say it: Secretary Zinke, Stand Up for Public Lands.

Prepare: PCT Statistics 2016.

Looking great: The Purveyors Show

Andrew shares some thoughts about what happens when climbers die.

Kathrin is down under, backpacking. [German]

Boom! 50% on outdoor garments at Alpinetrek.co.uk.

Spend $100 at Backcountry.com and get 15% Off your Cart With Code: 15OFF100.

Trip Reports

Join Kate on a Walk to Lac Blanc.

Cass rides the Tahoe Twirl.

Sam goes SUL on the North Country Trail.

Robert goes packrafting on the Rheinsberger Rhin. [German]

Dennis embarked on a huge adventure. [German]

David went for a wee bikepacking trip.

Gear Reviews

Read my La Sportiva TX2 Review.

Alex reviews the ÜLA CDT ultralight pack.

View Andrew Skurka’s Custom Core 13 Three-Season Clothing Collection.

Drew reviews the Salomon Sense Ride.

And a review of the Salomon X Alp 23.

Uli tries a lot of gear at the Sportscheck-Testival.

And a review of the Burley Nomad Trailer.

Disclaimer: There are affiliate links in this article to help finance the website. Read the Transparency Disclaimer for more information on affiliate links & blogger transparency.

Hello, morning dew


from Hiking in Finland http://ift.tt/2fRoxJp

Tuesday, August 15, 2017

Simon 2 in Burquitlam by Otivo

Riding off of the hugely successful Simon, the next opportunity by Otivo Development Group arrives in West Coquitlam. Simon 2 is a boutique collection of 82 modern residences offering 1, 2 and 3 bedroom homes:

  • 31 units – one-bedroom ranging from 581 to 728 sqft
  • 36 units – two-bedroom ranging from 807 to 952 sqft
  • 15 units – three-bedroom units from 992 to 1412 sqft

The highly anticipated second phase is the perfect mix of tranquility and urban convenience with skytrain, parks, walking trails, schools, shops and daily amenities all located within minutes of Simon 2.

The post Simon 2 in Burquitlam by Otivo appeared first on Vancouver New Condos.


from Buildings – Vancouver New Condos http://ift.tt/2uZiUL1

Monday, August 14, 2017

Simon 2 in Burquitlam by Otivo

Riding off of the hugely successful Simon, the next opportunity by Otivo Development Group arrives in West Coquitlam. Simon 2 is a boutique collection of 82 modern residences offering 1, 2 and 3 bedroom homes:

  • 31 units – one-bedroom ranging from 581 to 728 sqft
  • 36 units – two-bedroom ranging from 807 to 952 sqft
  • 15 units – three-bedroom units from 992 to 1412 sqft

The highly anticipated second phase is the perfect mix of tranquility and urban convenience with skytrain, parks, walking trails, schools, shops and daily amenities all located within minutes of Simon 2.

The post Simon 2 in Burquitlam by Otivo appeared first on Vancouver New Condos.


from Buildings – Vancouver New Condos http://ift.tt/2wKmdrg

La Sportiva TX2 Review

On recent trips I haven’t worn trailrunning shoes. That’s because I switched to the La Sportiva TX2, an ultralight approach shoe which I found great for backpacking, scrambling & Via Ferratas. Read my review to see if you should switch to them too & how they fare in the snow.

La Sportiva TX2 Meets Fox

Disclaimer: La Sportiva provided me last year with the TX2 for free to take them to the Dolomites. Additionally, since the beginning of 2017 I’m sponsored by La Sportiva. This did not influence the article as I maintain full editorial control of the content published on this site. Read the Transparency Disclaimer for more information on affiliate links & blogger transparency.

Time

I received the TX2 last year in late September, just in time for my backing trip to the Dolomites. I have used them on several hiking and climbing trips since, and they’re also my city shoes of choice at the moment. All in all I have hiked, approached mountains, cycled and walked around town several hundred kilometres in them.

La Sportiva TX2

Function

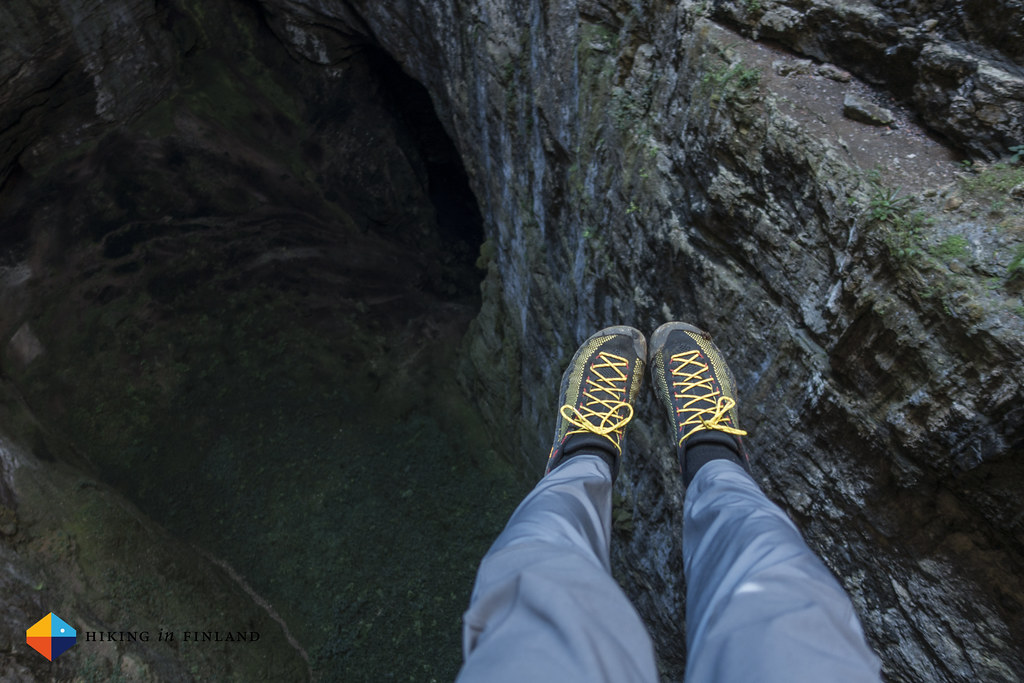
The TX2 is the lightest approach shoe La Sportiva makes. It’s main purpose is to take you into the mountains to the start of your climb, where they can be banded together and you can clip them to your harness while you climb your objective, so that at the summit you can slip back into them and walk back down (or rappel, which is more comfortable than rappelling in climbing shoes). I have found them also great for Via Ferratas and backpacking, as they’re very grippy and allow me to scramble securely.

Camp on the fourth morning

Features

The TX2 packs these features:

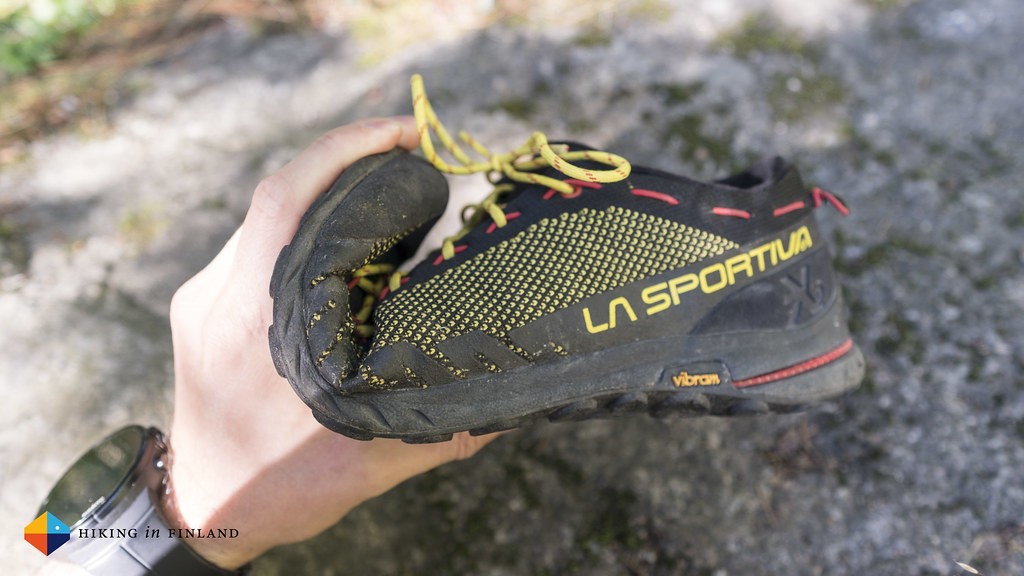
  • One piece (seamless) polyester knit upper for amazing breathability, drainage, and comfort
  • Extremely lightweight and packable for harness attachment or throwing in a pack with the C2™ ComboCord around the heel
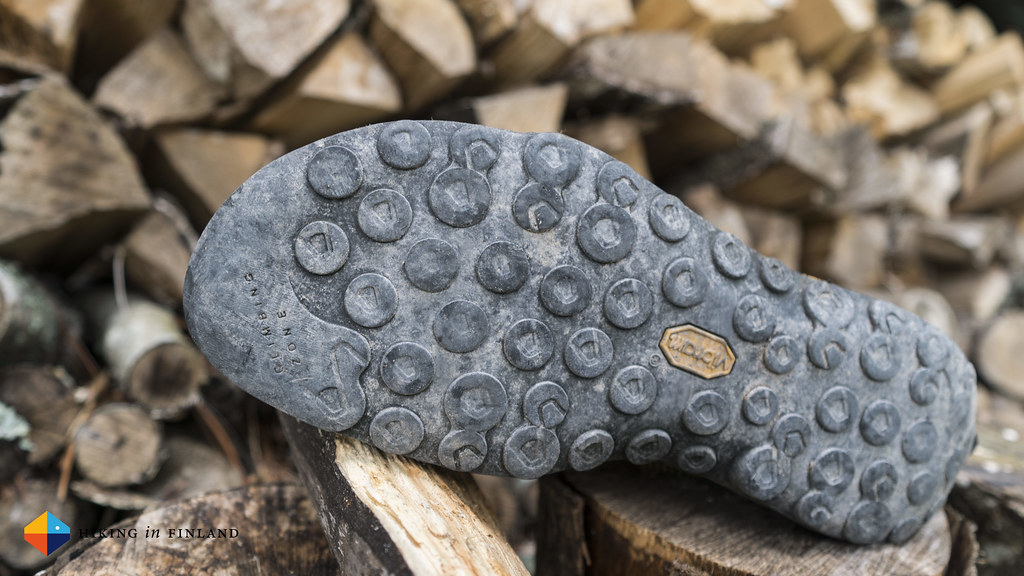
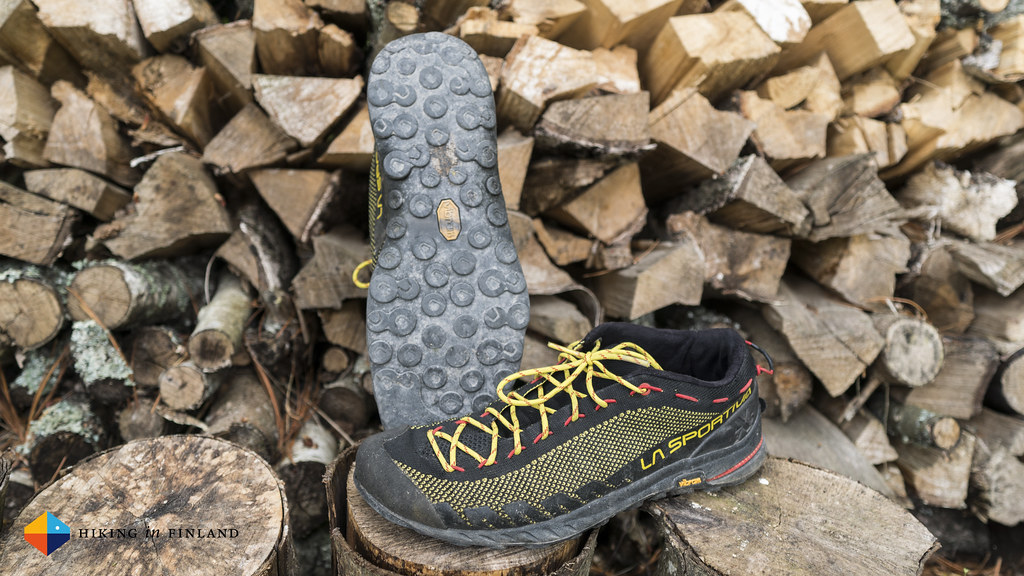
  • Über-sticky Vibram® Mega-Grip™ rubber outsole

La Sportiva TX2 Sole Pattern

Technical Innovations

I haven’t seen something like the C2™ ComboCord around the heel of the shoe, which allows you to wrap them together and clip them to your harness. It’s what has drawn me to the TX2 initially and is a cool little feature for climbers, but backpackers probably won’t make much use of it - unless you carry a second pair of shoes (maybe some Luna Sandals?!) in which case you might find it useful to pack them small together.

La Sportiva TX2 packed together

Quality

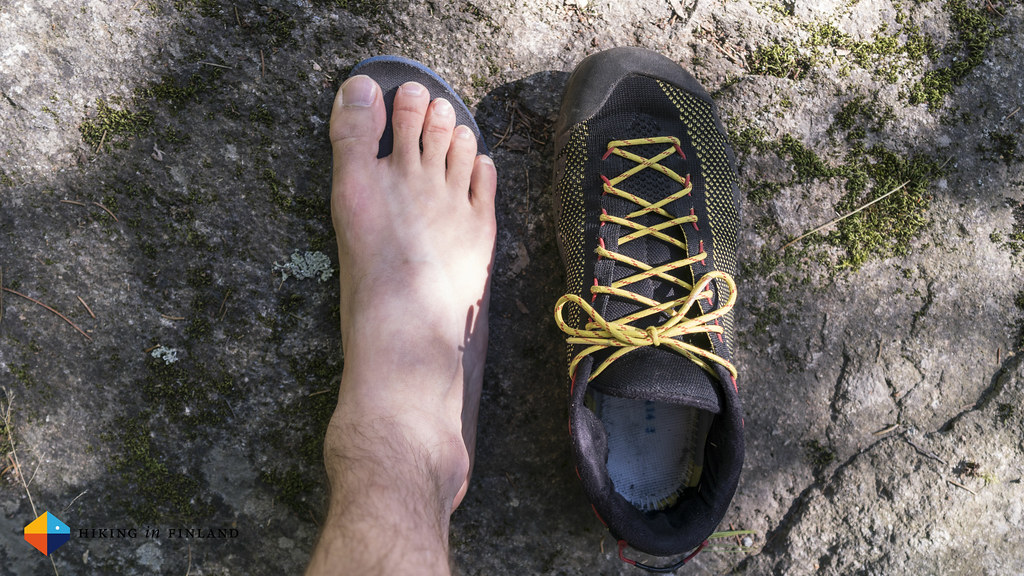
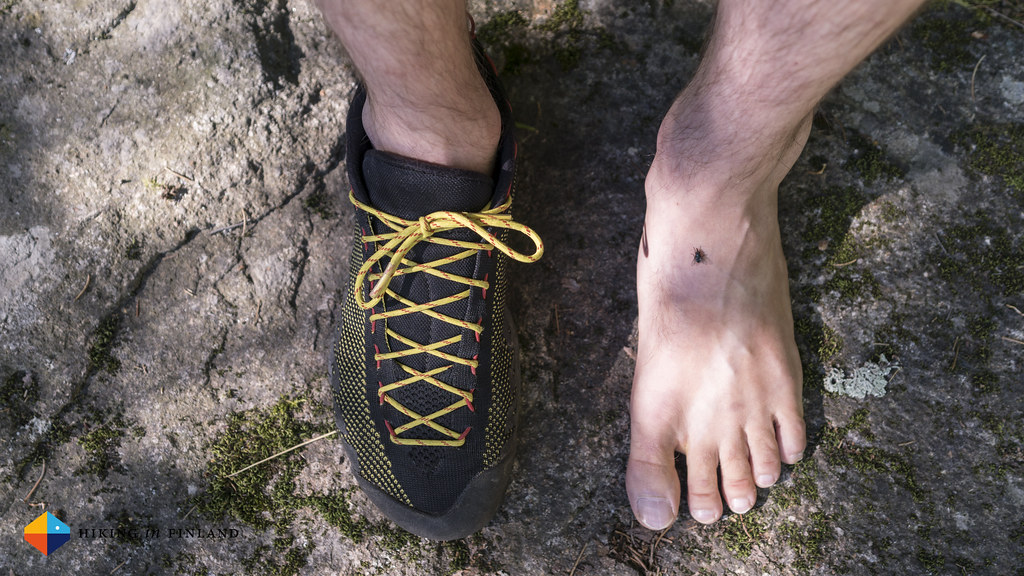
As I wrote above, I have used this show for almost a year in autumn, winter, spring and summer on the limestone of the Dolomites, Finnish granite, snow & asphalt and wooden trails and have never found anything wrong with them. They’re always comfortable for my feet with a good fit in the heel, and the toe box is wide enough to accommodate my toes.

Weight

I’m wearing a Size 42 TX2 and in that size it weighs 283 g per shoe, or 566 g for the pair.

La Sportiva TX2 on nice trails

Sustainability & Recyclability

Since 2003 La Sportiva has been using the ISO 14.001 Environmental Management System (in conjunction with the ISO 9.001 Quality Standard, like any smart company!). In 2010 they made investments to make the production and working environment better, and in 2016 Lorenzo Delladio, the president and CEO of La Sportiva, was awarded the honour of “Knight of the National Order of Merit” for conducting the family business with an eco-sustainable approach that is aware of the company’s social responsibilities towards the environment. That’s about all the infos I found on their website, as well as that there’s some Vegan shoes and garments available from La Sportiva, but sadly there’s no further information on how you should recycle your shoes or apparel when they’re worn out.

Scrambling up the Seekofel in my La Sportiva TX2

In use

As always, this is the most important part of the whole article - get a cup of coffee and then read on.

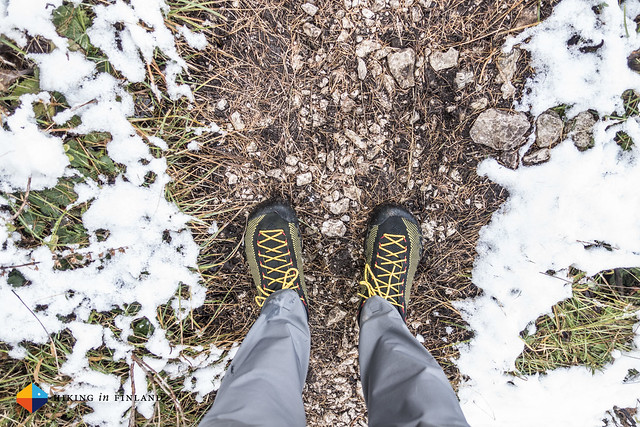
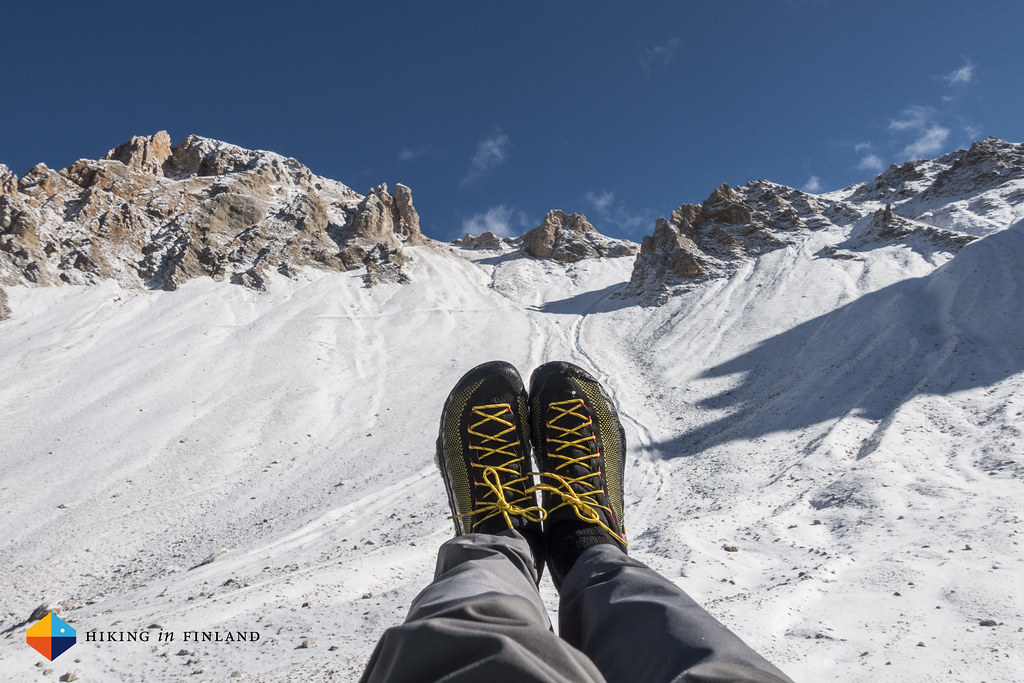
As I asked La Sportiva if they’d like to send me a pair of TX2 for taking them to the Dolomites it was a nice surprise that a week later they were with me and I could test them already a bit on my local trails before flying south to the Alps. The TX2 is light - really light for an approach shoe, which can easily weigh double as much as these. That lightness also means they’re very breathable - which is great in warm weather (but I still got warm feet in the jungles of Mexico) - but can get a bit fresh if you happen into snow on your hike. Nevertheless, with some good Merino socks that was also not a problem, and I was happy to descend a steep and snowy mountain in them. The upper dries pretty fast, after descending a snowy pass and continuing the hike it was about an hour later that shoes and socks were dry again. The shoe has a wee toe bumper which means impacts from the front or kicking steps into soft-ish ice and snow are nor problem, but it’s very short. The thinly padded tongue is stitched to the upper from the middle down which keeps it centred and is an elegant solution the tongue hanging out to one side or the other.

Ran that snowy pass down in the La Sportiva TX2 =)

I like the Vibram Mega-Grip Traverse-Lite sole of the shoes, these do have an exceptional great grip on wet rocks of all kind. The lugs aren’t very deep (common design in approach shoes) so wet, grassy slopes and very muddy trails need to be navigated carefully, but with the right technique that’s not a problem either. The climbing zone at the front allows you to scramble & climb easier grades (this postulates that you have the skills), and that’s also what makes these shoes pretty good for Via Ferratas. The sole is pretty soft which I like too - stiff shoes are not good for me unless the activity really demands it (ice climbing). These shoes edge well, which means small foot holds - think a one centimetre or less - are for me easy to place my feet on and stick it. I routinely go “bouldering” with these shoes when I’m out with the kids, and they are great for that.

La Sportiva TX2 Climbing Zone on the Sole Flexible

Which brings us to the fit. I can move and splay my toes in the shoe in my normal hiking lacing up, but if you’re serious about the scrambling and climbing you can lace the shoe up very tightly for a better feel. It’s a pretty low volume so very thick socks are not recommended. The construction, in conjunction with the lacing makes the shoe wrap around my foot like a comfortable glove. I can jam my foot into a crack when climbing and know the shoe and my foot will stay put. The heel again is very good for my foot, even if laced loosely it has a secure fit and the microfleece-like lining is soft & comfortable. The shoe has a 4 mm Ortholite Approach which I find a good match, I generally don’t like shoes with much drop and these are right there where I like it.

Foot on insole Hi there, Fly. Side View TX2

Could be better

I could say that they could be lighter, but I fear that make them less durable, so all in all there really isn’t anything that I can think of that could make them better.

Competing Products

I have used quite a few pairs of approach shoes, and while some where good - like the Arc’teryx Acrux² FL GTX - others I didn’t like that much. La Sportiva themselves also offer a variety of approach shoes, and the TX2 is just the start.

Hi there deeeeeeeep cave!

Bottomline

Overall I really like the La Sportiva TX2 and that’s not just because La Sportiva sponsors me. It’s a lightweight shoe which works for me in many different situations, from every day cycling and walking to backpacking and Via Ferratas in the mountains. I keep them laced up and just slip in and just lace them tighter when it gets more vertical. Despite the lightweight construction the shoe has held up very well thus far and almost daily use for 6 to 8 months hasn’t make them look worse - I believe I’ll be using these still next year in the autumn! Which brings me back to the question from the start: Should you switch from trailrunning shoes to these? If you use trailrunning shoes only for hiking & backpacking and not for actual trailrunning then I think you should give these definitely a try. At 566 g a pair in Size 42 they are as light as many trailrunning shoes and share many of the properties which you like from them: Breathability, grip and flexibility. They add packability and the climbing sole means you can navigate scrambles on your hikes more securely, which for mountain treks is a useful benefit. I’m very happy with my switch and don’t think that I’ll move back for the foreseeable future.

You can see more photos of the TX2 in this Flickr Album.

Where to buy them

You can buy the TX2 via any of these affiliate links and I’ll get a small commission (without extra costs to you!) which helps running the site.

The TX2 is available at Alpinetrek.co.uk (30% off right now!), Backcountry, Campsaver.com and REI. Readers from Germany, Switzerland and Austria can find the shoe at any of the shops in the underneath widget:

Hi there, La Sportiva TX2!


from Hiking in Finland http://ift.tt/2wXhfXy

Friday, August 11, 2017

The Week in Review 267

Soft & Hard/ A Sea of Clouds/ The Night Takes Over.

'Sea-Mists At Sunset' - Garn For, Snowdonia

If you enjoy The Week in Review & other articles why not support me with a coffee or two? I work Full-Time on Hiking in Finland to bring you inspiring trip reports, in-depth gear reviews and the latest news from the outdoors. You also could subscribe to the rarer-than-ever Newsletter and follow along on Instagram, Twitter and Youtube for more outdoorsy updates!

News

Hike Meal Plan is a new, pretty detailed meal planner for your outdoor trips.

What are the most Popular Hike in Each US American State?

Cycling fallacy: People should wear helmets when cycling, that would make it safe. Ähem, Nope.

One Australian’s March for Indigenous Rights.

The Life and Climbs of Voytek Kurtyka.

How to Lose Your Age on the Trail.

The Stories of The Volunteers of the Outdoor Women’s Alliance.

A Photo that won’t die.

The evolution of adventure journalism.

The Answer is Possibly Maybe Yes. The Questions is Have Smartphones Destroyed a Generation?

European Readers can save pretty big at the Alpinetrek.co.uk Summer Sale which also offers free shipping!

Save Up to 50% OFF Web Specials and Past Season Products at Patagonia + FREE Shipping.

Spend $100 and get 15% Off your Cart With Code: 15OFF100 at Backcountry.com!

Trip Reports

Luc’s Arctic Refuge Traverse is one for the bucket list again.

Jessie makes a Stop in Udabno in the Georgian Desert. [German]

Paul backpacks from Hell Roaring Creek to Thundercloud Creek, a great looking trip.

Shelly hikes to Frog Spring.

David hikes up Mt. Tateshina.

Krister writes about WiFi Expeditions.

Munich - Geneve - Barcelona by bike! [Finnish]

Climbing the Dent Blanche Regular Route South Ridge looks gorgeous.

Matthis finsihes 2nd on the Pitz Alpine Glacier Trail - congratulations! [German]

Peter was out in the Howgills and had some cracking weather.

Jill has 60 hours for hiking in Ouray - and even squeezes in a hike en-route!

A Running Camp in Alaska.

15 hours up to the Aiguille Jardin on a new route. [German]

Drew and his family made a Self Guided Walking Tour Of Reykjavík.

Alex’s Field Notes from the Haute Route Pyrenees.

Christy is backpacking the Golden Trout Wilderness Big Loop.

Packrafting Alaska’s Arctic Wildlife Refuge.

Ran that snowy pass down in the La Sportiva TX2 =)

Gear Reviews

How-to Go Tubeless with your bike tires.

A Review of the Big Agnes Onyx UL Tarp.

Disclaimer: There are affiliate links in this article to help finance the website. Read the Transparency Disclaimer for more information on affiliate links & blogger transparency.


from Hiking in Finland http://ift.tt/2wOEJhA

Tuesday, August 8, 2017

How-to Go Tubeless

Tired of punctures & flat tires? Go Tubeless and don’t worry about them anymore. In this article I show how you can convert your bike to tubeless tires with the help of the Schwalbe Tubeless Easy Kit, your one stop solution with everything you need to go Tubeless.

The Gear needed

Disclaimer: Schwalbe has provided me the Tires, Tire Booster and Tubeless Easy Kit for free for this article. This did not influence the article as I maintain full editorial control of the content published on this site. Read the Transparency Disclaimer for more information on affiliate links & blogger transparency.

Flat tires on 29” wheels, they where common for me back with my old 29er. Happily I started to drive more careful and punctures have been rare in the last several years, but as I welcomed the Trek 920 Disc to the family I decided I wanted to ride it Tubeless. There where some good reasons for that:

  • You can save weight. I’m still a ultralight backpacker at heart and if there’s a possibility to save weight then I’ll take it.
  • Adiós, Punctures! Don’t like that sound of your inner tube going flat? I hate it, and with a healthy dose of your Latex liquid in your tube that sound is unlikely to reach your ears again.
  • Traction, baby! Less pressure on the tires means you have more traction - pretty useful in sharp curves and lose trails.

So, with three good reasons to get rid of inner tubes I set out on a sunny afternoon to convert my 920 Disc to Tubeless. It isn’t a quick operation by all means so make sure you have a couple of hours of peace to go about this. Here’s what you’ll need:

Frontwheel finished!

Alright, with all your tools and gear ready it’s time to start.

  1. Preparation is KEY! Your Tire Booster needs to be “primed” first, so take your floor pump and put some 11 bars of air in it - that way you don’t need to do it later. Also, a good thing to do is to unfold your tire - if you’re using a tire that comes folded like I did - before you start the whole operation - and hang it into the sun. It will warm up and get a tiny, tiny bit more flexible which makes it easier to put on the rim later.

  2. Lets first check if your rim is Tubeless-Ready. If it is it should be written on it somewhere - either it reads Tubeless Ready or “TLR” somewhere. If they are: Great, that saved you several hundred Euros for new Rims!

Is the Rim Tubeless Ready?

  1. Time to deflate the tube, remove tire + tube + old rim tape, and get cleaning. Take a soapy rag and clean the inside (and while you’re at it, also the outside) of the rim, remove all dirt & dust and then dry it well off. That’s because the next step is quite crucial for the success of the whole operation, and if you hurry through this you might do it twice, so calm and relaxed proceed you shall. Now you grab the Tubeless Rim Tape (these are available in different widths, make sure to buy the one which works best for your rim!) and apply careful and precisely the tape to the inside of the rim. Start opposite of the hole where the valve will go through later, and apply it carefully and cleanly with a lot of pressure to the rim, and avoid air bubbles. I say it again: This is a very important step, so don’t hurry and take your time. If you’ve gone once around and reach the start go another 5 to 10 cm and then cut the tape. Now take the Tubeless Valve from the Tubeless Easy Kit and put it through the rim tape where it belong. Make sure to screw it tightly onto the rim, as the area around the valve can be a point where air easily escapes.

Schwalbe Tubeless Easy Kit New rim tape Rim Tape Done!

  1. Time to take your Tubeless Tire and mount it carefully onto the rim. If you can don’t use the tire lever as it might damage the rim tape - if you had your unfolded tire hang in the sun this should be possible. Make sure that the tire’s beads are on each side of the valve before you head on.

  2. Time to inflate! Apply a generous coating of the Easy Fit assembly liquid to both sides of the tire beads, the (clean!) soapy water would work too. For the first inflation a powerful burst of air is needed so take the Tire Booster (or if you have one, the compressor) and attach it to the valve. It makes sense to take the top of the valve off to allow more air through-flow, you get a wee tool for that in the Tubeless Easy Kit. Alrighty, this is the moment of truth: Open the Tire Booster and see how your Tubeless Tire inflates. It should set with several loud BANG! sounds onto the rim, only if you hear that you know everything went as planned. You need to check the line on the tire to control if the complete tire is correctly mounted, if not knead and push the tire to get it into the right position.

Easy Fit! Tire Booster in action

This can be a stressful moment if you don’t hear that loud bang which indicates that the tire beads have engaged the rim - I tried for over an hour to get it to set down. The thing is that 29” tires (and Fatbike Tires even more so) take a lot of air to fill and that in my case the Tire Booster didn’t have enough power to engage the complete tire - it didn’t set down on a couple of places which means that the air was escaping and I couldn’t move on. The solution is to empty the whole Tire Booster into the Tire to get the Tire to set down on as many places on the rim as possible, and then switch to the Floor Pump and keep on inflating the tire. This did the trick for me - the tire looked almost like it was going to burst but in the end I heard the several loud bangs which meant the tire was now fully engaged to the rim. Success, at last!

  1. Now that the tire sits on the rim you can take the pump/ compressor/ Tire Booster off the valve. This will deflate the tire a wee bit, but that’s not a problem. Remove the valve insert if you haven’t done that already in the previous step and take a bottle of the Doc Blue puncture protection liquid - not it’s time to put it into your Tire and make it Tubeless! You can easily fill the bottle through the valve into the tire - for 29” tires you use the whole 60 ml, smaller tires need less. Once the bottle is empty you put the valve insert back, take the floor pump and inflate the tire again - around 2 bar for these 29” tires is good for starters. Remove the pump, close the valve and now you’ll need to roll and shake the tire for quite a bit - the goal is to distribute the puncture protection liquid everywhere in the tire so that an even cover covers it from the inside. To check the tire once more for leaks you can cover the outside of the tire along the rim with your soapy water - there where there’s bubbles building up you need to move the puncture protection liquid on the inside to cover it better.

Doc Blue goes in! Checking for leaks

If the tire now stays inflated you can attach it back to the bike and get started on the second wheel, after which you should head out for a test ride. All good? Then pack up your bike and head out on a bikepacking Microadventure - Tubeless Edition!

Schwalbe Thunder Burt Tubeless

I’m now riding since over a month Tubeless and love it. I can ride my tires with less pressure on the trails which equals better traction, but of course the biggest benefit for me is that I don’t need to worry about punctures and snake bites anymore, as the puncture protection liquid seals those immediately should they happen. It’s just a great feeling to know that you can ride how you want without needing to worry that you might end up with a flat tire! Finally, if you’re a friend of moving pictures then have a look at this video which is by and far the best on how to convert your tires to tubeless tires! More Information on Tubeless you can find on the Schwalbe Tubeless, while the Tubeless FAQ can answer additional questions you might have.

If you enjoyed this & other articles why not support me with a coffee or two? I work Full-Time on Hiking in Finland to bring you inspiring trip reports, in-depth gear reviews and the latest news from the outdoors. You also could subscribe to the rarer-than-ever Newsletter and follow along on Instagram, Twitter and Youtube for more outdoorsy updates!

Off on Tubeless Adventures


from Hiking in Finland http://ift.tt/2uBOVIP

Friday, August 4, 2017

Irving Living in New Westminster

Altima Group is in preconstruction with their new 28 unit development comprised of 12 condos and 16 townhouse located in New Westminster. Townhomes will come in a 2 storey configuration, while condos will come in 1, 2 or 3 bedroom options. Each home will have spacious 9′ ceilings, Samsung stainless steel appliances and quartz countertops. Most homes will be overlooking the Fraser River and into Surrey. This development is situated by in a quiet residential neighbourhood, yet conveniently close to all the boutique stores and restaurants along Columbia Street.


The post Irving Living in New Westminster appeared first on Vancouver New Condos.


from Buildings – Vancouver New Condos http://ift.tt/2uc3pnc

Landmark on Robson

The famous Landmark Hotel boasting one of Vancouver’s revolving restaurants is being redeveloped to host 241 units of 1, 2 and 3 bedroom units ranging from 500 square feet to 2500 square feet. The completion date has been set to 2021 and will host views of English Bay, Coal Harbour, Stanley Park and the North Shore Mountains. With this development situated in downtown, owners will be close to retail shops, restaurants, nightlife and more.

The post Landmark on Robson appeared first on Vancouver New Condos.


from Buildings – Vancouver New Condos http://ift.tt/2u8Owhx

The Week in Review 266

Green and buzzing/ lost among the trees/ silence in the forest.

Forest

If you enjoy The Week in Review & other articles why not support me with a coffee or two? I work Full-Time on Hiking in Finland to bring you inspiring trip reports, in-depth gear reviews and the latest news from the outdoors. You also could subscribe to the rarer-than-ever Newsletter and follow along on Instagram, Twitter and Youtube for more outdoorsy updates!

News

The making of “This Land Is Our Land”.

The highest Bivy Hut of Switzerland gets 100 years old. [German]

QUASI OUT has a new URL.

Oregon opened a 668-mile singletrack mountain bike trail.

An update from LAUFBURSCHE on his health (& work!) situation. [German]

The Tern GSD looks like a great family bike.

And the Alpinetrek.co.uk Summer Sale now has up to 60% off on some great pieces of gear - like these Speedcross 4 from Salomon.

Want to save more? Take an additional 15% off your entire order at Backcountry.com! Use code 15OFFCART at checkout.

Trip Reports

Jeremie writes superbly, and his illustrations are wonderful, too. So two very good reasons to go read his Lofoten Road-Rock Trip Report.

Chris finds a quiet corner of the Cairngorms.

Joe rides along the Adriatic Crest of Croatia.

Hiking with mom in the beautiful Elbsandsteingebirge. [German]

A hard day on the JMT.

The Trinity ALps looks spectacular, and Leor takes us this time to Papoose Lake.

The Seven Summits of Saalbach Hinterglemm. [German]

Pauls reports in from aadventures in Colombia - well, save to say it’s one for the bucket list!

Packrafting in Montenegro looks fun!

A yellow Monkey (doing Karate) on the Colorado Trail.

And we stay on the CT, where Beardoh and SweetPea have now hiked already 467 miles.

The Mittellegigrat on the EIger looks great. [German]

Paybacks.

Bring on these fine views. [Polish]

Hiking & packrafting through wild Scotland.

Broken Piezo ignition removed

Gear Reviews

A very brief look at the Nordisk Lofoten 2ULW.

Six tips on how to clean your soft flask bottles. [Danish]

The revamped Revelate Designs Harness gets trail tested.

Ulrich reviews the book GeoWandern Münchner Umland. [German]

Disclaimer: There are affiliate links in this article to help finance the website. Read the Transparency Disclaimer for more information on affiliate links & blogger transparency.


from Hiking in Finland http://ift.tt/2v5pS2t